

General Purpose Library Wonderware System Platform Demonstration Setup Guide
Table of Contents
![]() Opening and Deploying the Demonstration Project 8
Opening and Deploying the Demonstration Project 8
![]() Creating the Galaxy Demonstration Project 13
Creating the Galaxy Demonstration Project 13
![]() Intouch Application Migration 15
Intouch Application Migration 15
 Purpose


1
Introduction
The aim of this document is to provide a step by step guide for the installation and setup of the General Purpose Library (GPL) with Wonderware System Platform using the supplied Demonstration Project.
 Prerequisites
The guide has been tested on the following software:
- EcoStruxure Control Expert V14.1
- OPC Factory Server (OFS) V3.62 for AVEVA / Wonderware System Platform version, using the System Platform License
- Wonderware System Platform 2017 Update 3 The General Purpose Library used:
- Modicon Libraries General Purpose 2020 for EcoStruxure Control Expert
- Modicon Libraries General Purpose for Wonderware System Platform 2018 R4


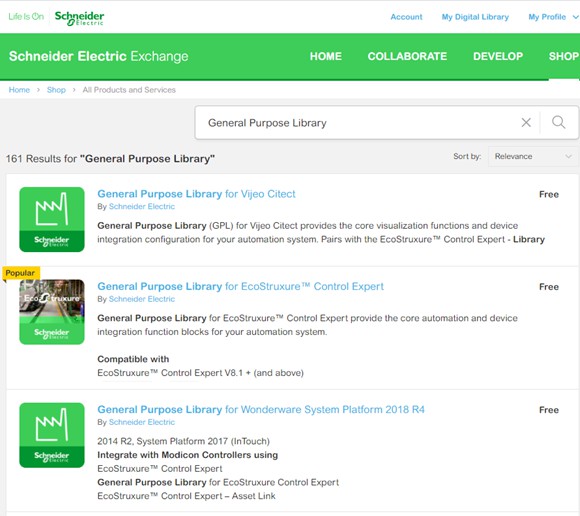
2 General Purpose Library Download
The General Purpose Library can be downloaded from Schneider Electric Exchange https://exchange.se.com, navigate to the shop and search for ‘General Purpose Library’ order and download:
- General Purpose Library for EcoStruxure Control Expert
- General Purpose Library for Wonderware System Platform 2018 R4
 Extracting the Zipped Files
Both downloaded files need to be extracted due to the file name length. Rename both to GPL-CE.zip and
GPL-WSP.zip respectively.
Modicon-Libraries—General-Purpose-2020.zip => GPL-CE.zip
Modicon-Libraries—General-Purpose-for-Wonderware-System-Platform-2018-R4.zip => GPL-WSP.zip

Extract both zip files into their respective folders.
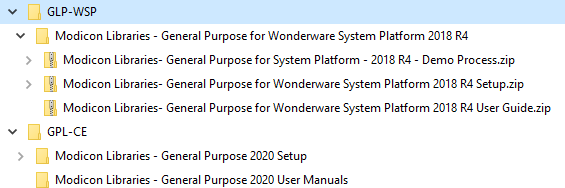
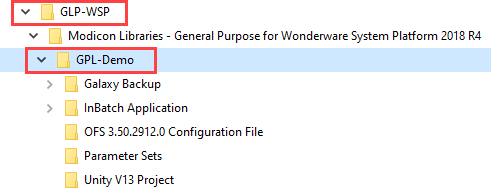
Open the GPL-WSP Folder and rename Modicon Libraries- General Purpose for System Platform – 2018 R4 – Demo Process.zip to GPL-Demo.zip and then extract into a folder.


 Installation
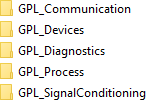
Installation has been divided into five library families:
Each family needs to be individually installed using the EcoStruxure Control Expert Types Library Update
tool.
- Open the Types Library Update
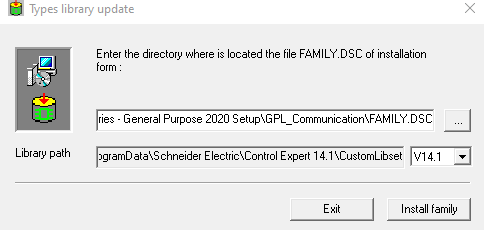
- Navigate
 to the folder “GPL-CE\Modicon Libraries – General Purpose 2020 Setup\GPL_Communication” and select FAMILY.DSC
 - Select the Install family button after a few seconds an Installation has succeeded dialog box will appear
- Repeat for:
- GPL_Devices
- GPL_Diagnostics
- GPL_Process
- GPL_SignalConditioning
- The Library installation is complete
 Opening and Deploying the Demonstration Project
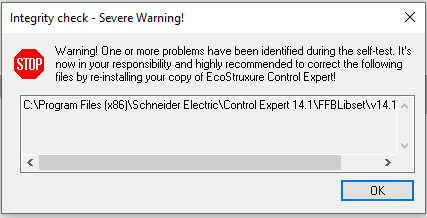
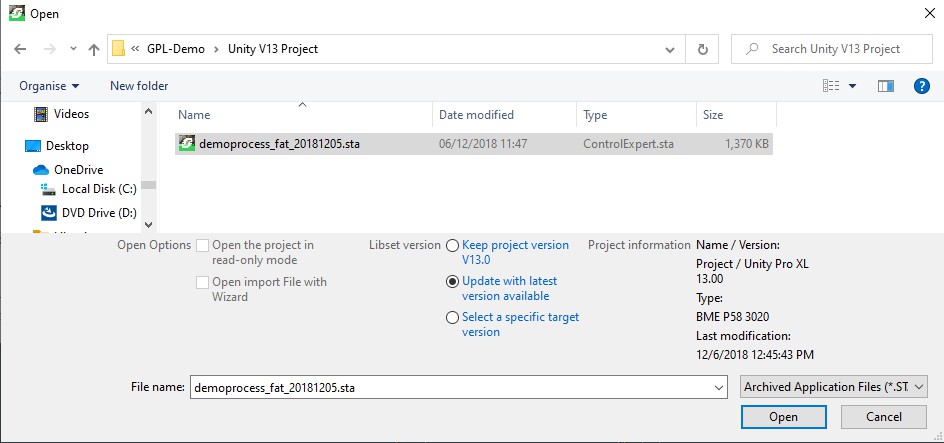
- Once the General Purpose Library has been installed, start EcoStruxure Control Expert. On starting a warning will appear – please ignore and select OK
- Open the Demonstration Project by selecting Open
- Change the folder to “GLP-WSP\Modicon Libraries – General Purpose for Wonderware System Platform 2018 R4\GPL-Demo\Unity V13 Project” and change the file type to STA
- Select the demoprocess_fat_20181205.sta
Select Update with latest version available
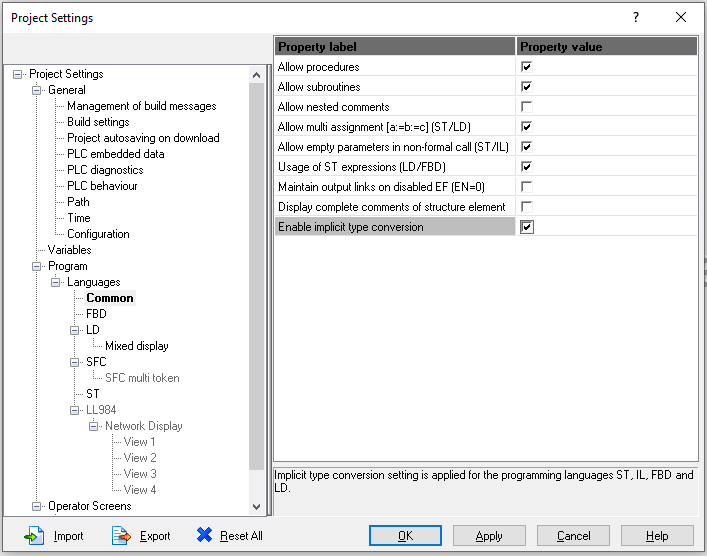
- Once opened, select Tools > Project Settings >Common
- Select checkbox Enable implicit type conversion
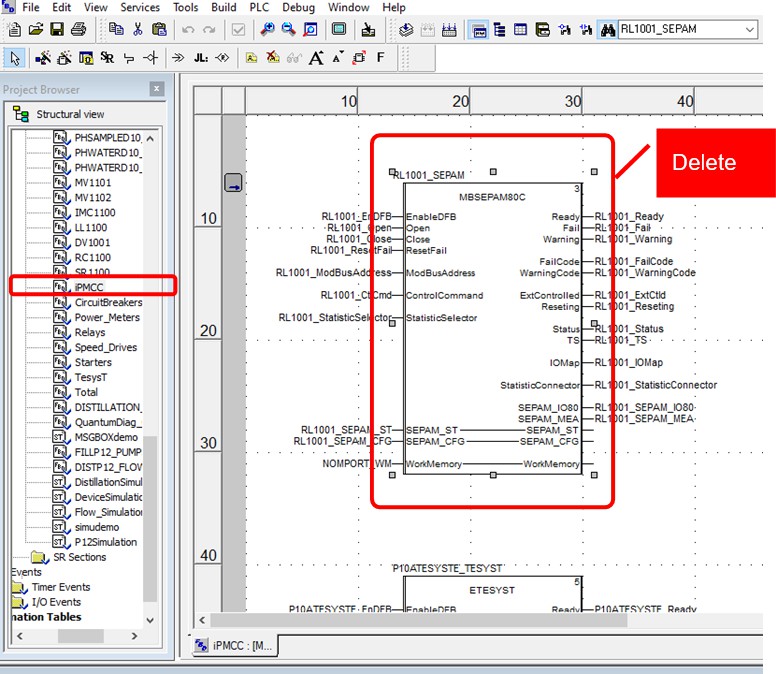
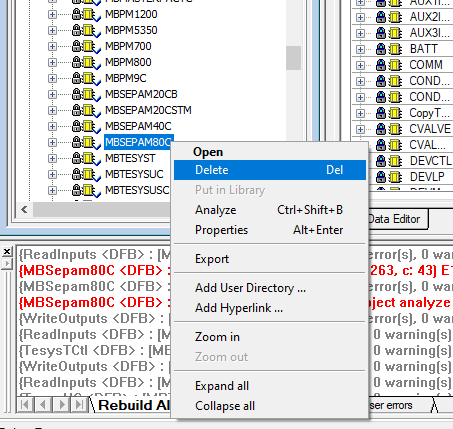
- There is an upgrade error within the block MBSEPAM80C – this has been reported and will be fixed in the next release. As this is a demonstration, we can simply remove the block.
- Open the logic section called iPMCC and locate RL1001_SEPAM which uses the function block
MBSEPAM80C and delete the function block
- Open Variables & FB instances and select the Function Blocks Tab and search for
*RL1001_SEPAM*
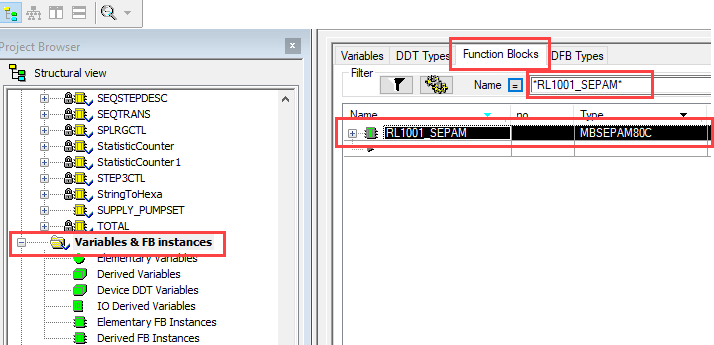
- Select RL1001_SEPAM and Delete
- Open the Derived FB Types and delete the function block MBSEPAM80C
- Select Build > Rebuild All Project, accept the default dialog boxes
- Save the project
- Now deploy the project to the Simulator


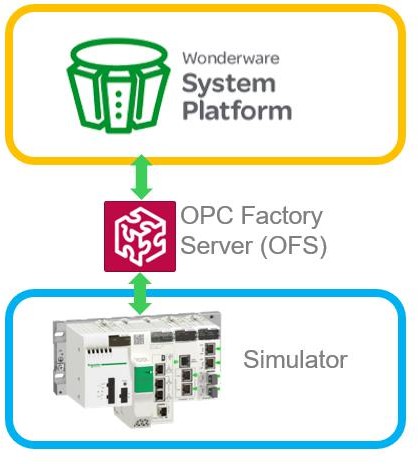
Configure OFS Server
- Open the OFS Configuration Tool
- Select File > Open Archive
Navigate to the folder GLP-WSP\Modicon Libraries – General Purpose for Wonderware System Platform 2018 R4\GPL-Demo\OFS 3.50.2912.0 Configuration File
- Select Backup-20171214.xml
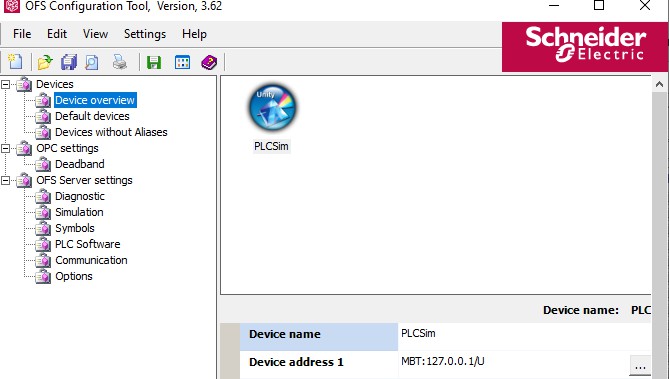
- Select File > Save Configuration
- If the OFS Server is running it will need to be restarted before the new configuration will take effect


 Windows Users and Groups
The Demonstration Project has been designed using Windows Group Security and the PC requires the following groups to be defined:
-
- PCSAdministrators (mandatory to open the Galaxy)
- PCSEngineers
- PCSOperators
- PCSSupervisors
Assign the current user to the PCSAdministrators group
 Creating the Galaxy Demonstration Project
To create a Galaxy based on the Demonstration Project follow the steps below:
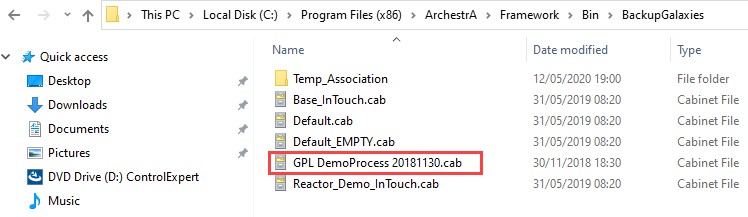
Copy the file GPL DemoProcess 20181130.cab from GLP-WSP\Modicon Libraries – General Purpose for Wonderware System Platform 2018 R4\GPL-Demo\Galaxy Backup
- Paste the file to C:\Program Files (x86)\ArchestrA\Framework\Bin\BackupGalaxies
- Open System Platform IDE
- Select New Galaxy and set the name to GPLDemo and select the Galaxy type as GPL DemoProcess 20181130
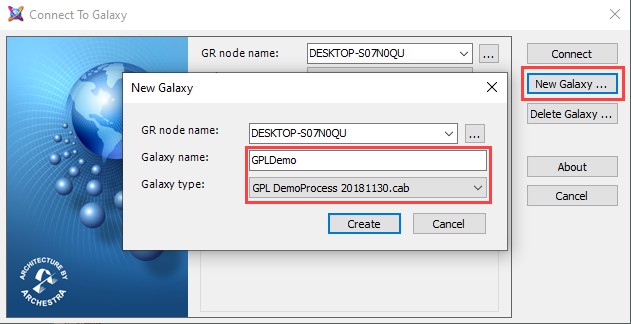
- Click Create
- You will be required to log into SQL for authentication. It’s recommended you include the Computer Name and Username, e.g., DESKTOP-S07N0QU\Admin and click OK

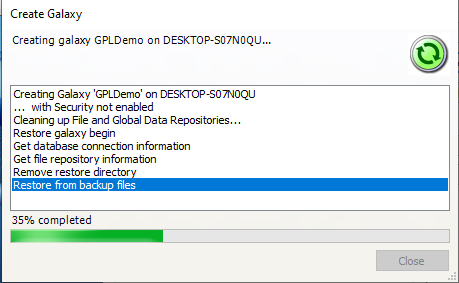
- Creating the Galaxy will take some time
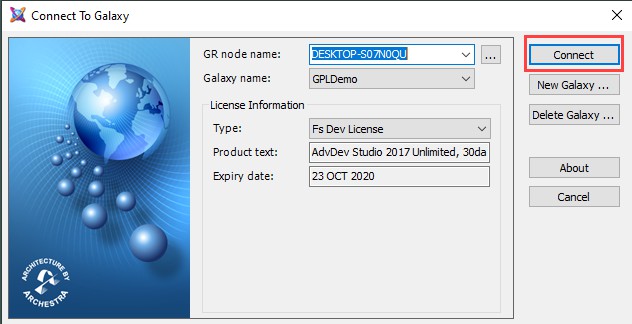
- Once completed, select the Connect button
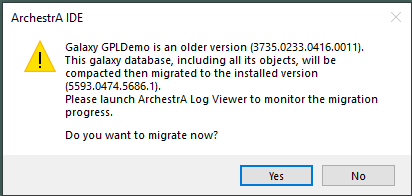
- If the Demonstration Galaxy version supplied is different to the Wonderware System Platform installed, the user will be asked to migrate. Note: this can take over an hour and cannot be aborted or cancelled. If you are happy to continue, select Yes.
Once finished the IDE will open
 Intouch Application Migration.
Follow the step by step guide to Migrate Intouch:
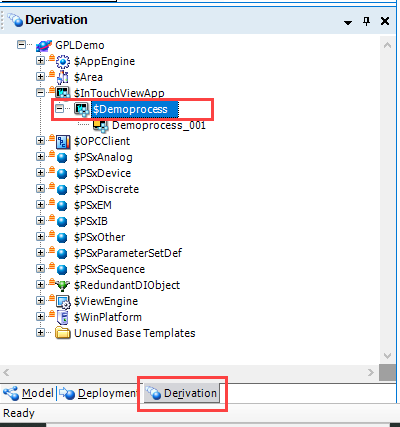
- Select the Derivation Tab at the bottom and Navigate to $Demoprocess
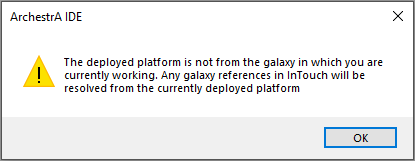
- Select $Demoprocess and Right Click > Open
- Click OK to the Dialog ArchestrA IDE
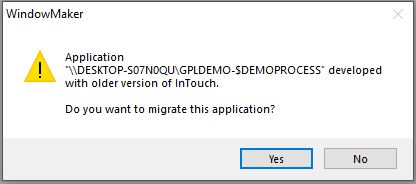
- After a few seconds a WindowMaker popup will appear asking ‘Do you want to migrate the application’ Select Yes
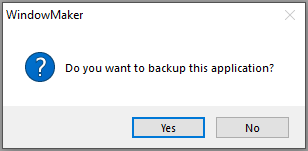
- You will be asked ‘Do you want to Backup this application’ – select No
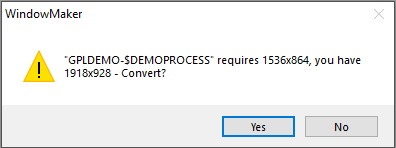
- Depending upon your resolution, WindowMaker will create another popup asking to convert the resolution – click Yes
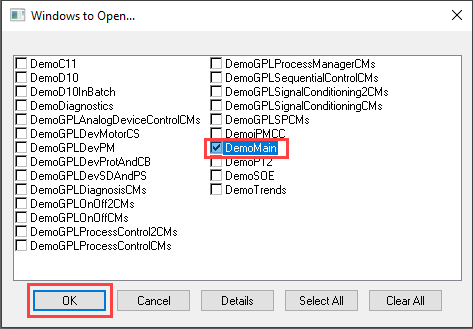
- WindowMaker will open and the Migration will start. Each page will be opened and updated. Once finished, select DemoMain and OK.
- Within WindowMaker Select File > Exit

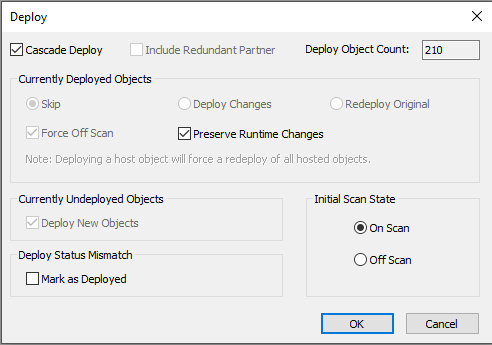
- Click the Deployment Tab and select PSxWinPlatform_001 and Right Click > Deploy
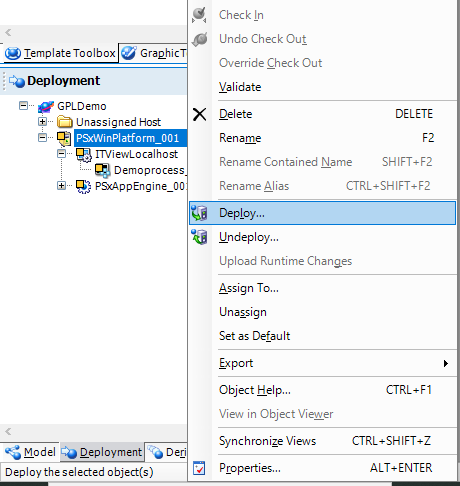
- Leave the default values and click OK (it will take several minutes to deploy)
 WindowViewer Application
There are two methods of opening the WindowViewer:
Method 1
-
-
-
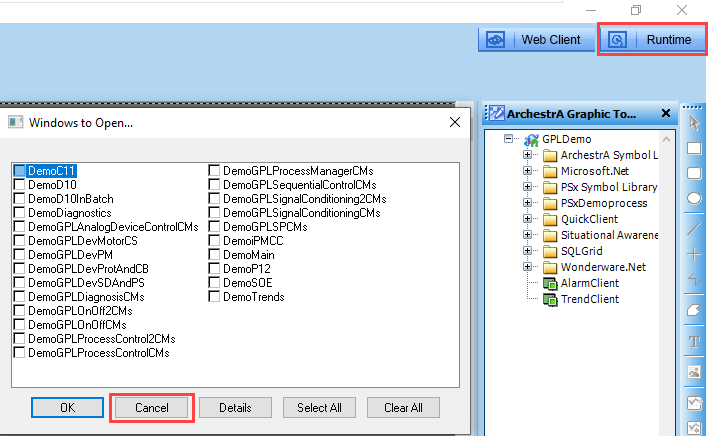
- Select the Model Tab and open Demoprocess_001
-
-

-
-
-
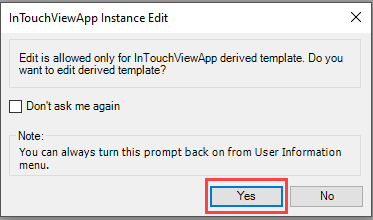
- If a popup appears asking to allow editing of derived template, click Yes
-
-
-
-
-
- Cancel the popup asking to Open Window and select Runtime button (top right corner)
-
-
-
-
-
- WindowViewer will Start
-
-
Method 2
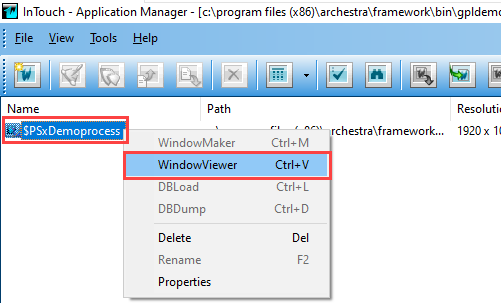
Select Start Menu > Wonderware InTouch > InTouch Application Manager
-
-
-
- Select $PSxDemoprocess > right click WindowViewer
-
-
-
-
-
- WindowViewer will Start
-
-
 ParameterSet Configuration
To use the ParameterSet functionality a Database called ParameterSets needs creating within SQL Server and the supplied backup database restoring:
Copy the folder GLP-WSP\Modicon Libraries – General Purpose for Wonderware System Platform 2018 R4\GPL-Demo\Parameter Sets to C Drive
- Open the SQL Server Management Studio
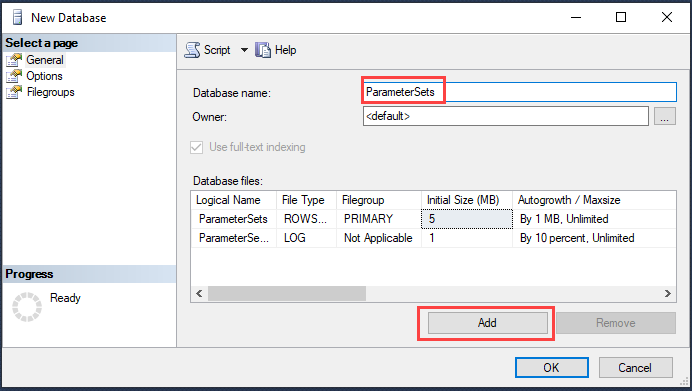
- Right click on Database and select New Database

- Name the Database ParameterSets
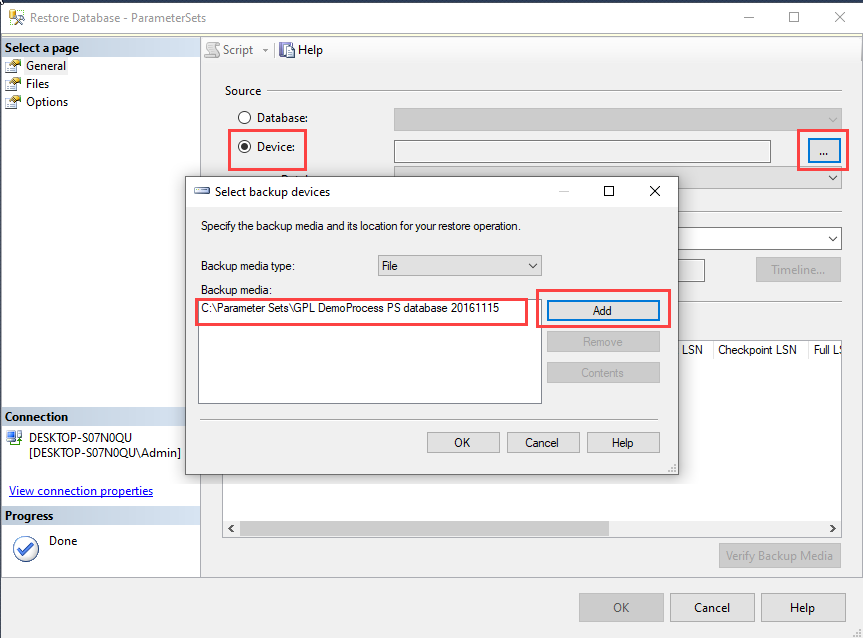
- Select the ParameterSets > Right Click >Tasks > Restore > Database

- Select Device and the Folder selection Button

- Select Add and Navigate to C Drive/Parameter Sets/ GPL DemoProcess PS database 20161115 Note: to select the file change the extension filter to *.*
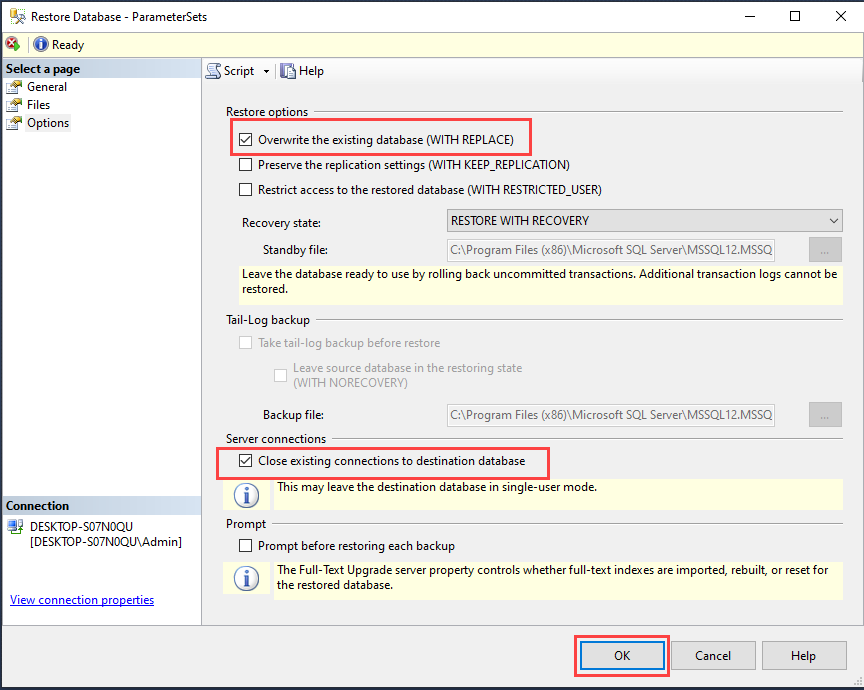
- Select the options tab and select the following checkboxes:
- Overwrite the existing database
- Close existing Connections to destination database Once selected, click the OK button
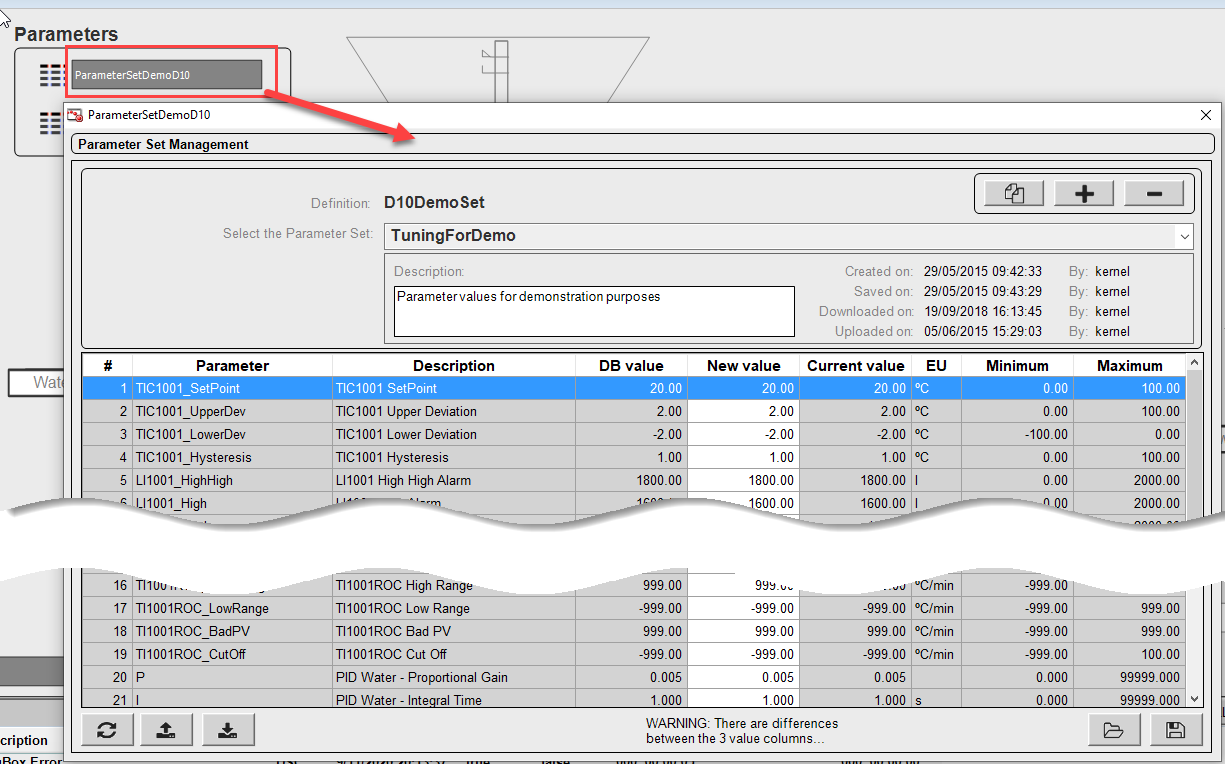
- Once the database has been restored, it is possible to now open the Parameter Set within the WindowsViewer

Responses